Wednesday, January 6, 2016

I Took the Bait

Links and photos related to the 365 Challenge (click on the link at your own peril if you haven't been corrupted yet) have been popping up everywhere. I resisted as long as I could but finally succumbed to temptation.
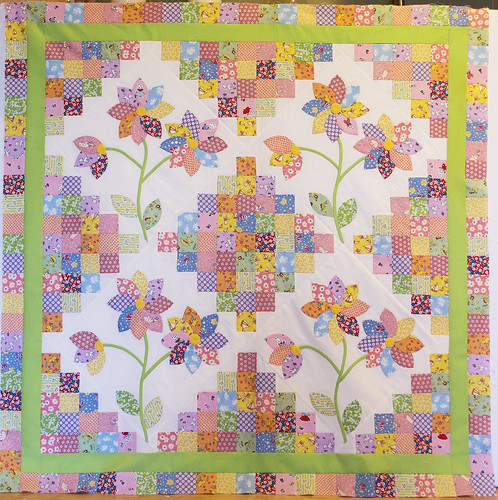
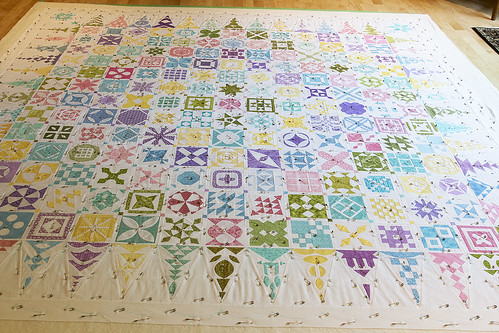
The principle of the challenge is to make a block a day for 365 days. At the end of the year you will have the blocks to make a stunning 90"x 90" quilt. Something like this:


I was a little intimidated by the sheer size of it but then realized that I don't have to make a ginormous quilt if I don't want to. I can do as much as I feel I can handle.

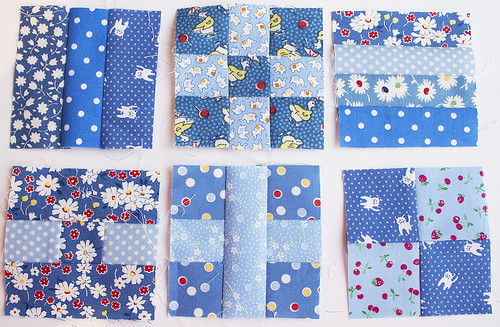
That being said, I'm pretty fired up right now, so here are my first 6 blocks:
365 Challenge First 6 Blocks
The plan is to use 30's Reproduction fabrics in red, white, and blue. The first blocks are for the dark inner section and I'll keep them mostly blue, I think.

As I was making the blocks, I realized that there will probably be some standard widths, especially since the first 96 blocks are all 3"x 3".
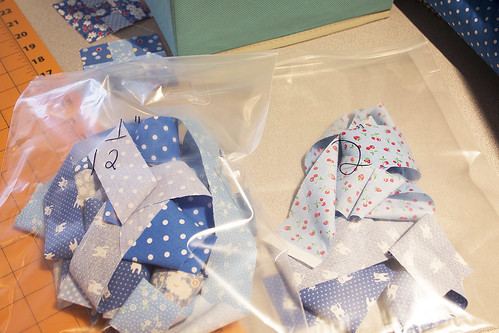
I'm organizing my strips by size. Right now I have the 1 1/2" and 2" strips separated in zip bags. The last block calls for 1 1/4" strips but I decided to just cut down some of the 1 1/2" ones. I want to be careful not to have too many things to sort through.
Strip Organization
All the fabrics I'm using are available in the store. If you'd like more details, let me know.

Tuesday, January 5, 2016

Hexies for Handwork

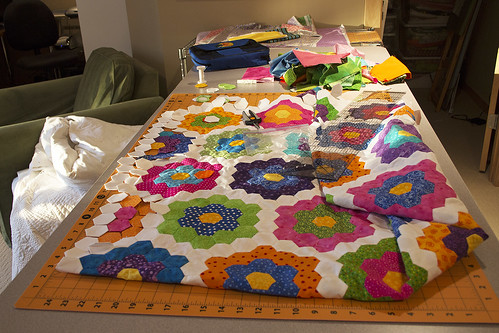
I like to keep my hands busy while watching television at night. I just bought a lovely new crochet pattern and REALLY want to jump into that project but remembered that one of my goals for the new year is to finish what I started. So...out came the hexie quilt. From 2007!

I had trouble deciding on a border back in September of 2014. I tried two or three different options and had to rip it out every time because I hated it. Now I'm going to pull the trigger, decide on a border and go for it. Hoping to have it done before its 9 year anniversary in June 2016.
Hexies in the morning sun Doesn't it look really pretty in the morning sun?

Monday, January 4, 2016

First up for 2016

To start the year of with a small bang, I'm planning to finish the following projects by the end of February. I'm REALLY hoping to get them done by the end of January but we have a trip or two planned (and the Baby Jane is HUGE), so time may be limited.

Oopsie Daisy:
Oopsie Daisy Quilt
Baby Jane #1:
Dear Jane pinned!
Sailboats:

A photo posted by Twiddletails (@twiddletails) on

Friday, January 1, 2016

2015 Completed Projects

Only five and all quite small, but here they are.
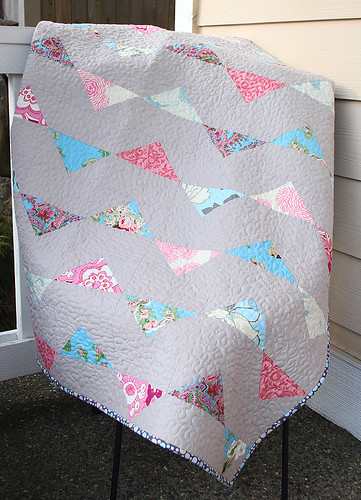
Bunting Baby Quilt 1:
Bunting Baby Quilt Pattern
Bunting Baby Quilt 2:
Bunting Baby Quilt in 30's Feedsack Prints
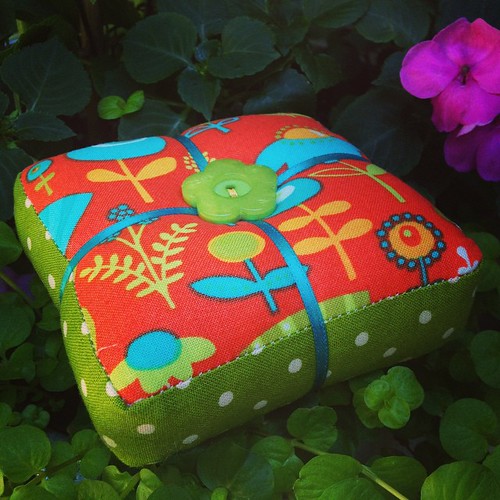
Pincushion:
Finished the Park Slope pincushion. Any sewing is better than none.
Little Joys Dresden Plate Mini Quilt:

A photo posted by Twiddletails (@twiddletails) on
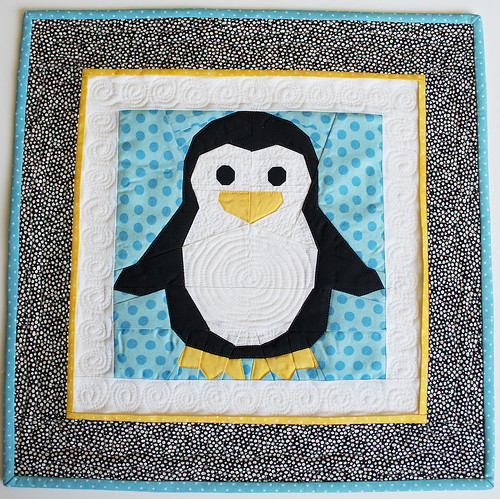
Little Penguin Mini Quilt:
Little Penguin Mini Quilt
I truly hope to have more to show in 2016. I have a few projects very close to the finish line and the plan is not to start anything new until I finish them.

Thursday, December 31, 2015

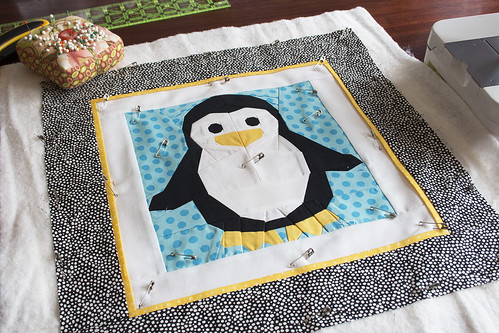
Little Penguin Mini Quilt

Yay! Snuck one more in successfully.

Little Penguin Mini Quilt
I decided not to quilt the polka dot background and I'm not sure if that was a good idea. I may change that. I quite like the three-dimensional yellow inner border though.

Upon further investigation it turns out that I actually did have 4 finishes before this, so now I have five. This is MUCH better than 2013 when I had zero. I'll post pictures of all the 2015 finishes tomorrow.

I'll be hanging it on my mini quilt wall as soon as I can get my hands on more clips to hang it from.

The block pattern is "Little Penguin", available on Craftsy. If anyone is interested in the measurements for the borders, etc., let me know. It's 16" x 16", so will make a cute little pillow cover, I think.

Wednesday, December 30, 2015

Last Minute Penguin Project

As people started posting their completed projects for the year, I decided to go back and look at mine. I knew it couldn't be good - it's been a year full of other events, like moving halfway across the country - but I didn't realize I had been this unproductive in the quilting arena.
Three completions. THREE!

One cannot compile a photo collage with three photos, so I figured I could whip up a fourth quickly using an orphan block. Since the mini quilt wall I started about a week ago (photo coming soon) is looking pretty bare too, this little quilt can serve two purposes.

Little Penguin
The block is the "Little Penguin" paper pieced block available in my Craftsy store.
I'm making a mini quilt but I think this would be a very cute pillow cover too. It just happens to be 16" x 16". And I just happen to have another block...

Thursday, December 10, 2015

Oopsie Daisy Quilt Top Completed

I finished the Oopsie Daisy quilt top today. It turned out really cute. Not sure when I'll have time to get to the quilting though. SO many other things on the burner this time of the year!

IMG_5284
(Kits are still available if you really, really like this little quilt. You can also purchase the pattern separately if you'd like to use your own scraps.)

I'm also working on a pattern. Something like this:

Stay tuned for more details.

Saturday, November 28, 2015

Random Things

Did a bit of multitasking on Black Friday - shopping and sewing. Perfect!

A photo posted by Twiddletails (@twiddletails) on

The Oopsie Daisy quilt is progressing well.
A photo posted by Twiddletails (@twiddletails) on

In shop news, Little Joys is 20% OFF this weekend only. Perfect for Holiday projects.
Some really pretty ones have been showing up on Instagram under #littlejoysfabric. Isn't this little pillow lovely?
A photo posted by Twiddletails (@twiddletails) on
Remember the Dresden Plate?
A photo posted by Twiddletails (@twiddletails) on

Tuesday, November 24, 2015

This is going to be pretty!

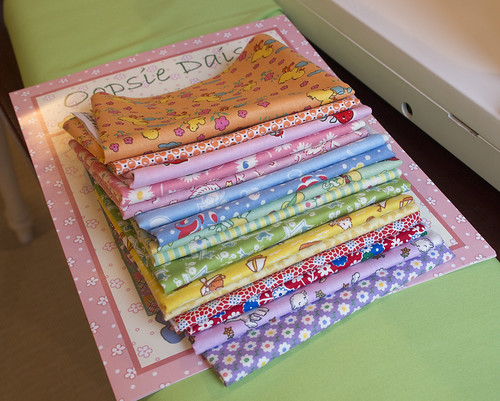
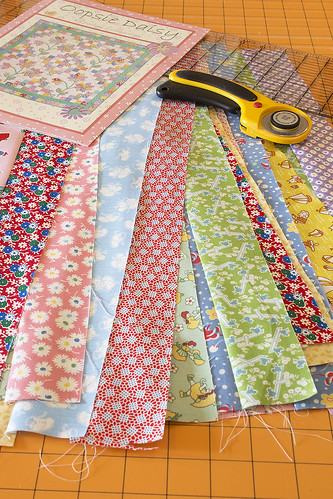
I work on the appliqué blocks for the Oopsie Daisy quilt at night, so I set aside some time this morning to start piecing. So far I've sewn thirty 2 1/4" strips together. It never ceases to amaze me that all 30's reproduction fabrics just seem to go together, even when they're really scrappy.

Oopsie Daisy Quilt Progress
(I've put together some kits with the fabrics I'm using, just in case anyone is as inspired as I am.)

Thursday, November 19, 2015

Making Circles for Appliqué

Since I last posted I've completed almost two of the 4 appliqué blocks for the Oopsie Daisy quilt.
I also discovered that I "only" have to make 84 petals, not 86 as I previously thought. Phew, what a relief!

A photo posted by Twiddletails (@twiddletails) on
The center of each little flower is a circle. I thought I'd share my method for making perfect (or as perfect as I'm going to get them) circles.

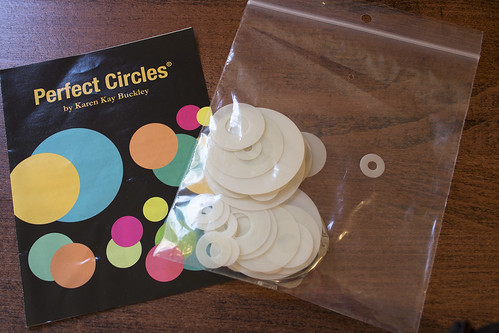
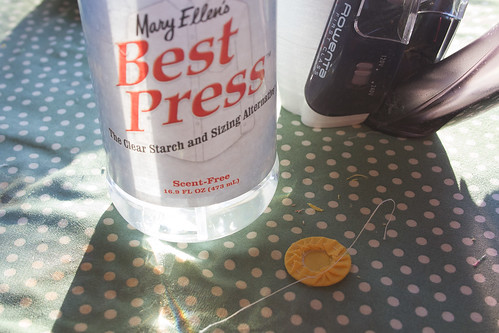
You'll need: a circle template in your preferred size - something sturdy like plastic or cardboard, spray starch - I like Mary Ellen's Best Press, an iron, needle and thread and, of course the fabric you want to make the circles out of.
My preferred templates for circles are Karen Kay Buckley's "Perfect Circles". There is an assortment in each package with multiples of the same size. You should be able to find these at your LQS. You can, of course, make your own templates, but I find I can never cut them perfectly smooth.
Applique Circles
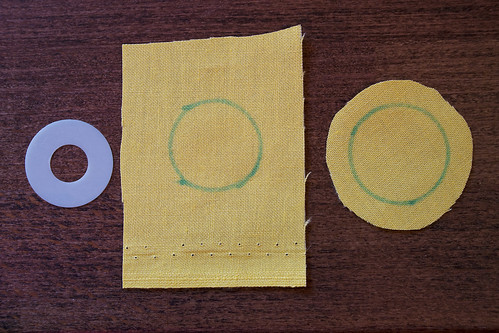
1. Place the template on your fabric and trace around it, using a disappearing or washable marker. Cut out, leaving a scant 1/4" seam allowance - smaller if you're making really small circles. I don't think it really matters whether you trace on the the wrong or right side of the fabric since you're going to have to get rid of the markings anyway but, if you'd rather not deal with it, trace on the wrong side.
Applique Circles
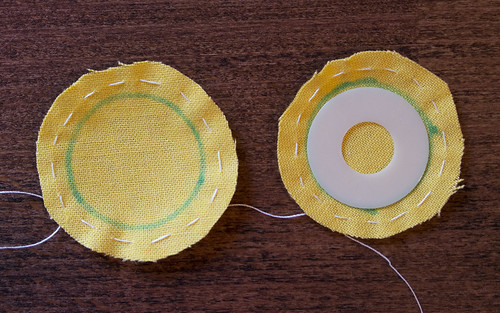
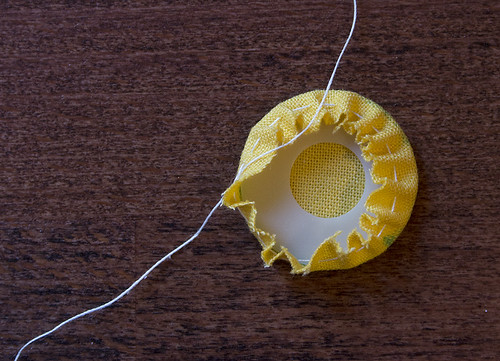
2. Run a basting stitch all around the circle about midway through the seam allowance. My stitches are about an eighth of an inch long. Leave thread ends at least 3" long to make the next step easier. Ensure that both thread ends are on the right side of the fabric this time. Pleace the template back into position on the wrong side of the fabric.
IMG_5204
3. With the template in position, pull on the two loose thread ends, gathering the fabric around the template. Tie the threads in a single knot.
IMG_5207
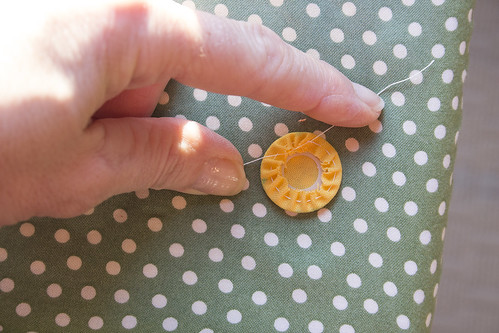
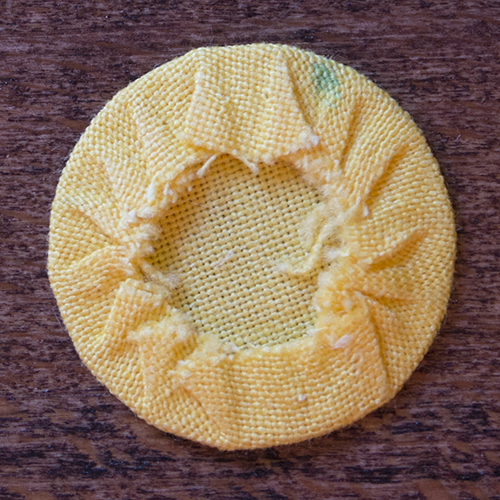
4. Now for the tricky part. Spray the bottom of the circle with starch. Pull the two thread ends in opposite directions with two fingers, thereby tightening the gather around the template.While holding on to the thread ends, press the circle with a hot iron until the the starch has dried.
IMG_5209
You should now be able to let go of the threads and your circle will hold its shape.
IMG_5215
5. Flip the circle over and spray the other side with starch as well. Press until dry.
IMG_5217
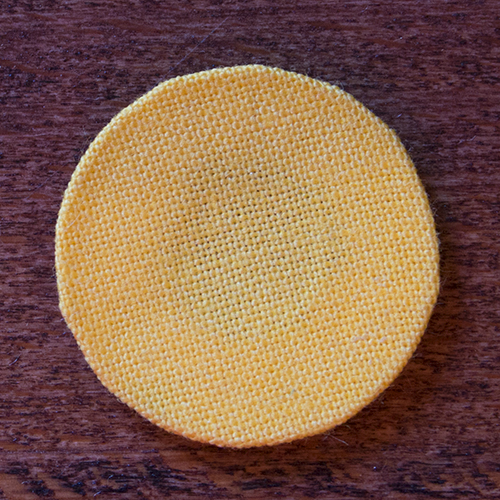
6. Carefully remove the template and thread. I like to starch and press the circle on each side one more time after this to ensure that it will hold its shape until it's securely appliquéd to my block.
IMG_5219
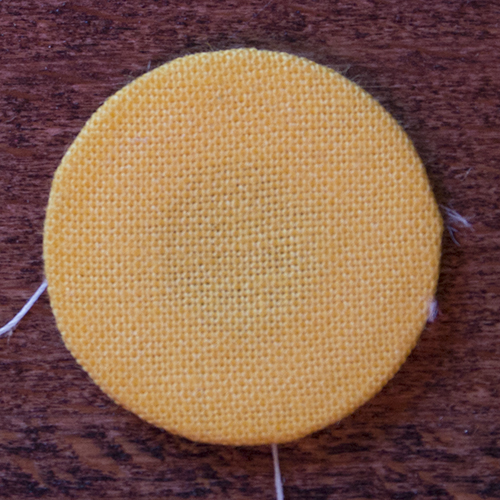
Voila! A perfect(ish) circle!
IMG_5220

Friday, November 13, 2015

Oopsie Daisy Progress

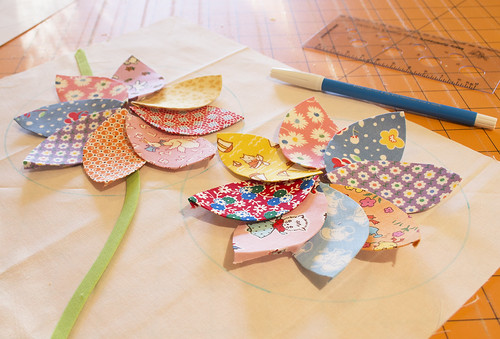
I decided to hand appliqué the Oopsie Daisy quilt. It's going to take a whole lot longer than machine appliqué but I feel it will be the more authentic way to go.
If I tackle it one daisy at a time, the 86! petals will hopefully not be so overwhelming. Plus, I find handwork very relaxing.

Oopsie Daisy Quilt
Off to go get some glue baste this morning. I'm not hand basting all these petals to the background!

Thursday, November 12, 2015

Insta-update

The Oopsie Daisy quilt is progressing nicely. Thought I'd share some Instagram photos.
I also figured out how to use press bars for stems and they're amazing! I'll share in a later post.

A photo posted by Twiddletails (@twiddletails) on

A photo posted by Twiddletails (@twiddletails) on

Wednesday, November 11, 2015

New Project!

I feel (once again) that maybe I have things kind of under control around here. Just not enough hours in a day...
Inspired by all the new 30's Reproductions in the store, I decided to make a little 30's quilt - actually just a wallhanging.

Oopsie Daisy

I'm using the "Oopsie Daisy" pattern by Darlene Zimmerman. It has size options for a wall hanging, twin, or queen size quilt.
It will be my first new project in a while, so I'm kind of excited to get started. Got to get the dog to the vet for her checkup first though. Why does life always interfere with fun?