Saturday, March 30, 2024

The Quilt Size Dilemma

I'm working on a new pattern. It's been years since my last one! 

From experience I know that quilters like choices, so I've been researching quilt sizes in order to offer multiple size options.

Wow, is that a jungle to wade through!

First off, "ranges" are hard to do for anything that actually has to go on a bed. I think for beds you have to figure out the mattress size, then how much of a "drop" you want and do the math from there.

But even that is NOT easy. I'd never heard of a "Wyoming King" or "Alaska King".

Olympic Queen? Maybe, but doesn't that sound like the name of a riverboat? California anything? Yes. XL? Yes.

In short, I'm still trying to figure this out. Stay tuned.

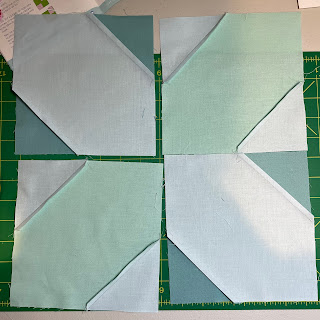
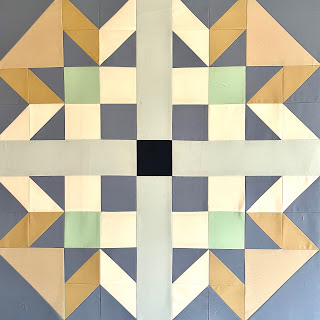
In the meantime, a sneak peek at the pattern.

Saturday, March 23, 2024

Scraps

One of my 2024 goals is to significantly reduce all my scraps. What do you classify as "scraps"?

Over here, anything that is too small to fold and put away is a scrap. I also don't save very small pieces of fabric.  I have friends who will gladly adopt these.

My first step was to take ALL the scraps and cut them into 2.5" wide jelly roll strips. I was AMAZED at how many strips I ended up with! I then sorted them by color because I am not a "just grab one" kind of girl. "Intentional scrappy-ness" is more my kind of thing.

Our guild donates hundreds of quilts to local charities each year.  That, combined with the fact that I'm getting a new quilting machine soon (stay tuned for a post full of excitement) and will need some quilt tops to practice on, kicked me into gear.

The first quilt was one I posted a couple of weeks ago, inspired by one I saw at show-and-tell at a guild meeting. I love it but it took a LONG time to put together.

So, the search began for a simpler pattern or two.  Pinterest is a mecca of jelly roll quilt inspiration.

Up first, the Color Stack quilt from Jennifer at Hopeful Homemaker.

Here's the result:


It took about a day to piece and I kind of love it! Her tutorial is great but, if you don't feel like figuring it out yourself, there is a pattern.

Being someone who does not like repeating things and gets bored really quickly, I am now on the hunt for the next idea.

Stay tuned.


Sunday, March 17, 2024

Challenges are fun!

I recently joined another small group, the focus of which is to challenge your creativity. And it's so much fun!

Every quarter someone from the group presents a challenge word or phrase and we have 3 months to make a little quilt interpreting that phrase. We are restricted to a maximum size of 20" x 20".

Sometimes I'm really inspired, sometimes not so much.

These are my quilts from the last 3 challenges:

"Round and Around We Go"

"Slow"

"Twisted Triangles"


I encourage you to challenge yourself! You'll be amazed at how creative you are, even if you think you're not.

Saturday, February 10, 2024

A Finish!

Finishes have been few and far between the last couple of years. In fact, my last list of completed projects was for 2016!

I saw a quilt like this at "show and tell" at my guild and it spoke to me. It took me about 10 minutes to figure out the design, since no one seemed to know which pattern was used.


This is Aila. She joined our family in March 2022.  She's getting a much needed bath today. :)


I partially chose this design because I have a whole tote full of 2.5" strips that need to go. I still have piles left, so another quilt (or two, or three) is in my future.
Perhaps a rail fence quilt? I think that will use more strips.

This is the show and tell quilt. Isn't it amazing? Because mine is meant as a charity quilt and they need throw quilts, not king size quilts, I reduced the size.
A note: If you want a symmetrical quilt, you have to make it square.  I only realized that when I was pretty much done with the top.

The pattern was eventually found. It you want to make the quilt, you can find it here:

Wednesday, January 24, 2024

Bottlecap Pincushion Fun

I seem to be trying all kinds of new things this year.

I do a lot of hand appliqué and have a little container to have all my supplies for a project contained and portable.

The small pincushion I was using was just a teeny bit too tall. When I close the lid, all the pins and needles get pushed down and I tend to lose needles never to be seen again.
I've wanted to make something a little smaller for a long time. When I saw a bottle cap pincushion on Pinterest (where else?), I knew this would work!

This took me about 45 minutes to whip up. It's a little wonky but not too bad for a first attempt.

I used wool from my wool appliqué stash. Wool felt will yield a more "perfect" result, but this is what I have.  If this becomes and addiction, which it could because it was SO much fun, I may invest in some.

I used the cap from a half gallon milk container, which yielded a pincushion about 1.5" in diameter.


See how perfectly it fits?

Saturday, January 20, 2024

A New Adventure

In 2022, we built a new home. We love it, but old "stuff" doesn't always fit into a new place and we now have an empty space above our fireplace and nothing to fill it with.


Even though I do not consider myself an artist AT ALL, I thought I'd try to make a little something to fill the area while we search for the perfect piece of art.
Something neutral and unobtrusive...


 Apparently, I don't do "neutral and unobtrusive" very well.

This may be a forerunner to the final product, but I am loving the process. It may just take me the rest of the year to complete though.

And we may find the perfect piece of art in the meantime.


Friday, January 19, 2024

It's 2024 already?!?

 The older I get, the quicker time seems to fly by.

I took stock of all my UFOs like I usually do at the beginning of the year. I have 5 more projects than I had at the start of 2023! Not good!

The plan for 2024 is to work on the projects that are closest to completion in order to shorten this list, but there are SO many distractions!

This was my biggest accomplishment for 2023. It was Sarah Fielke's 2023 BOM. I may actually quilt this!


New projects for 2024:

What are your quilty resolutions for 2024?


Saturday, October 7, 2023

It's October!

This morning it hit me that there are less than 3 months left in the year! Perhaps because the temperature dipped below 40 degrees for the first time, making Fall really sink in.


I decided to have a look at my WIPs and check how much I accomplished this year. The answer is "very little".
Still, it is nice to have a record of what I have in bins and totes. 😆
I use a spreadsheet to keep me abreast of things.


I found this idea somewhere a couple of years ago and customized it for my needs.

After a glance at the spreadsheet and because it's Fall and I don't have a single Fall quilt, I decided to get going on quilting the Bella Solids Leaves in the Forest quilt.

It's basted and ready to quilt!

I've assembled a couple of kits. They're available in the store right now.


If you'd like to make a list of your own, I have uploaded a blank Excel template to the "Twiddletails Quilt Alongs" Facebook group. Unfortunately I cannot upload Excel files directly to the website or the Facebook page itself.


Friday, March 10, 2023

New Projects for 2023

 I signed up for a couple of BOMs this year, actually in 2022. I also may have started a couple of other new projects...

This is how I circumvented my self-imposed rule of not starting any new projects in 2023. Clever right?

The first one is "The Secret Garden" by Sarah Fielke.

The colors and fabrics I chose are completely out of my comfort zone, but I love it!

I also actually purchased some fabric for this project, which I haven't done in YEARS!


Next up is The Quilt Show's 2023 BOM, called Homeward Bound. This was also designed by Sarah Fielke.


Thirdly there is this, a wool applique quilt called "Autumn" from Midway Wool. I will only be working on this one about once a month, so it will take more than one year, for sure.
I only have one completed block as of right now but isn't it cute?


Last, but not least, is "Martha Washington's Finest" By Lori Smith.


I'm not sure when I'll actually get to my other UFOs but quilting is all about having fun and I'm REALLY enjoying what I'm doing right now.

What are you up to this year?

Monday, December 5, 2022

New Tutorial - Quick Flying Geese (4-at-a-time)

This was long overdue!

I updated the Quick Flying Geese tutorial to make it easier to download and print.

You can still watch the video on the YouTube Channel over here.


Quick Flying Geese Tutorial (4-at-a-time)

This is a tutorial for making 4 identical flying geese units at a time, with absolutely no fabric wasted.


Determine the size of your cut pieces

1. Decide which size you’d like your flying geese units to finish at. (The height has to be half the width.)
2. Add ” to the shorter measurement. (a)
3. Add  1¼” to the longer measurement. (b)
4. Out of the fabric you wish to use for the sides of your flying geese, cut 4 squares measuring a x a.
5. Out of the fabric you wish to use for the center of your flying geese, cut 1 square measuring b x b.

For example,

To make 3” x 6” flying geese, you would cut:
4 squares measuring 3”out of "side" fabric
1 square measuring 7¼” out of center fabric


Construct flying geese units

1. Draw a diagonal line corner to corner on the WRONG side of each of the smaller squares.


2. Lay two of the smaller squares on top of the larger square RIGHT SIDES TOGETHER. Make sure your diagonal lines line up. Pin.

3. Stitch ¼” from the drawn line on both sides.


4. Cut along the drawn line.


5. Press the seams toward the smaller triangles.


6. Place the remaining squares on top of the units you just made, RIGHT SIDES TOGETHER. Pin.

 7. Stitch ¼” from the drawn lines on both sides.


8. Cut along the marked lines.


9. Press toward the smaller triangles.

There you go! Four identical flying geese units!


Download the PDF File

Watch the YouTube video

Saturday, December 18, 2021

My Favorite Color is Moda Sew Along - Blocks 18, 19, & 20

 I know, I know. The sew along ended quite a while ago.

Life has been crazy. I won't go into details, but I'm trying to wrap this quilt up (no pun intended) by the end of the year.

Disclaimer: Sometimes I will change the pattern instructions a little bit because a different way works better for me. This does not mean that the pattern won't work exactly as written. If you follow the pattern, your blocks will still turn out fine.


Tips/Instructions:


Blocks 18 & 19 are basically the same block, just with different fabrics and different sizes.

The only tip I have is seam direction. Press the seams on two sections toward the outside triangles and the other two toward the center sections. This will allow for nesting of the seams.


Sew everything together.


Block 20

1. Pressing the HSTs:
Fabric 2 & 7 - press toward fabric 7
Fabric 2 & 5 - press toward fabric 2
6 1/2" HSTs - press toward fabric 2

2. Pay attention to the 4 patches. They are not all identical.

3. Lay out everything as you go.  This will definitely save time and effort since this this is a pretty intricate block.


All the blocks are now done!!! Next up, assembly.

NOTE: I still have patterns for sale individually if you'd like to make your own version. I also have a couple of Grunge Trading post kits left. They are 40% OFF and shipping is FREE.


I'd love it if you join the Facebook Group and/or post pictures on Instagram and mention the blog (and tag @twiddletails) if you find this post helpful.

Thursday, October 7, 2021

My Favorite Color is Moda Sew Along - Blocks 16 & 17

Two identical blocks using different fabrics.

Disclaimer: Sometimes I will change the pattern instructions a little bit because a different way works better for me. This does not mean that the pattern won't work exactly as written. If you follow the pattern, your blocks will still turn out fine.

Tips/Instructions:

1. Making quarter square triangle blocks:

First make 4 HSTs.

Draw a diagonal line on the back of two identical HSTs as in the photo below. Place pairs right sides together as shown below.

The most important thing is to ensure that all the seams come together where they cross in the center.

I like to pin on either side of the center to ensure there's no slippage. Yes, I need new pins...
Sew 1/4" away from the diagonal line on both sides just like you would when making an HST. Cut on the drawn line and press. Here's the back.

2. Lay out all the pieces before you start sewing and every time you've sewn a seam(s) and take a photo.
 This will save you a lot of headaches and seam ripping. An example:                                                                                                

3. Take your time. It will save you time.


NOTE:  All remaining kits are on 30% OFF in both the Etsy shop and main store. I also have patterns for sale individually if you'd like to make your own version.


I'd love it if you join the Facebook Group and/or post pictures on Instagram and mention the blog (and tag @twiddletails) if you find this post helpful.